Any house must be insulated. This also applies to wooden houses, although the tree itself perfectly retains heat. The wooden base of the house will last much longer if you insulate it from the outside. Outdoor processing is a kind of protective function of the frame of a wooden house. In any room, thermal insulation requires mainly walls. It is through the walls that almost a third of all the heat from the house is lost.
Wall insulation can be carried out both inside the house and outside, but most often external insulation is used using "Penoplex" - extruded polystyrene foam. This building material in recent years has become especially popular and widely used, due to a number of its characteristics. The Penoplex insulation of a wooden house outside with your own hands is actually not as difficult as it seems at first glance. It takes only time and patience.
The advantages of external insulation
If you conduct insulation of the house, including the wooden one, from the inside, then the dew point is shifted. Thanks to this indicator, the required temperature level is determined. If the temperature is below the required level, condensation will form. The dew point in this case will be located inside the building. As a result, humidity will increase, the walls of the room will “sweat” and various mold will appear.
In addition, if the interior decoration of the building is carried out, this visually reduces the room. Another negative factor of internal insulation is the general deterioration of the indoor climate. If the house is insulated from the inside, but the tree cannot "breathe", and this also negatively affects its properties.
Warming a wooden house with Penoplex eliminates all these negative aspects.
The main characteristic features of Penoplex
Penoplex is a brand of extruded polystyrene foam. This building material has a number of positive qualities, due to which it is considered one of the best heat insulators. It should also be noted that this is a very light material, because it contains air microspheres.
The main distinguishing features of this material
- “Penoplex” does not absorb moisture;
- Effective heat insulator, due to which, when warming, you can use not too thick layers of material;
- Fire resistance. This building material is almost not subject to burning and does not produce any harmful substances that occur during combustion;
- Relative ease of installation;
- Reliability, durability, invulnerability to various types of exposure;
- On a penoplex, mold and fungus do not develop.
- Penoplex can be used in a wide temperature range: from -50 to +75 degrees;
- The service life is more than 50 years.
Types of "Penoplex"
The material is divided into several types depending on its density:
- density 28.0–33.0 kg / m³ - used for roof treatment;
- density 29 kg / m³ - for foundation processing;
- density 25 kg / m³ - for work with walls;
- density 25.0–35.0 kg / m³ - universal foam;
- density 45.0 kg / m³ - for industrial use.
Most often, universal polystyrene foam is used in the work, because it is in it that all the best qualities are combined, and it can be used to work with any part of a wooden house.
The process of wall insulation using “Penoplex” outside
- In order to insulate a wooden house with Penoplex yourself, you need to start with the preparatory phase. First you need to align all the walls, get rid of the bulges and roughness on them, otherwise then when you press on the insulation, it can break.
- Then you must primer the walls. Insulation plates have a smooth surface, therefore, in order for the mixture to stick well to them, their surface must be treated with a special plasterboard roller. You can also use a brush or knife to do this. Before starting work, all slopes and window sills must be firmly fixed.
- When making a warming of a log house with your own hands from the outside by Penoplex, it is necessary install crate. It is necessary to equip it with the help of wooden bars (25x50, 50x50), or metal profiles can also be used. This stage is very important when warming a wooden building from the outside with “Penoplex” and is necessary for attaching a heat insulator. In order for Penoplex to firmly establish itself in the openings, the size between the bars or profiles must be made five centimeters smaller.
- When the preparatory phase is over, go to insulation sticker. For work, you need two spatulas: small mixture is applied to a large spatula, and large - we process the wall surface. If the walls are even, then you can apply a thin layer, if not very even, then it is better to apply the mixture in small heaps, as in the photo.
Glue application process
Glue can be applied both on the walls and on the sheets of Penoplex itself. But it is better, of course, on the walls, because their surface has more roughness, and this will help polystyrene sheets to be well fixed. After applying the glue, it tightly applies and presses the heat insulator to the wall. After the foam is glued, you must wait at least three days for the glue to grip as best as possible.
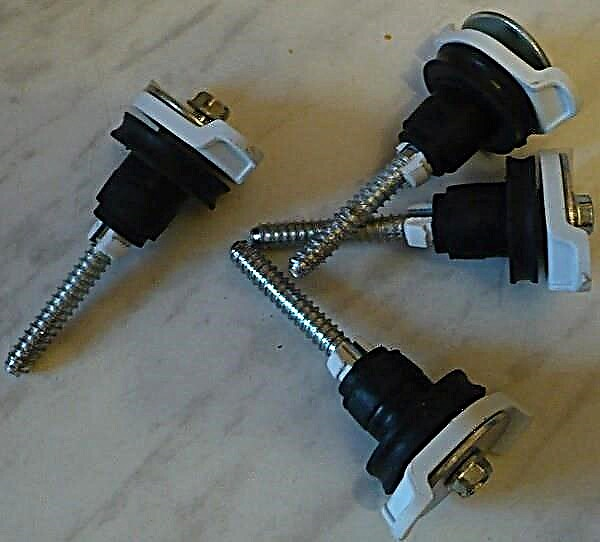
The process of attaching “umbrellas”
After gluing, the insulation must be nailed. You need to nail on special dowels - dish-shaped umbrellas. These are dowels made of plastic or metal with large hats. It is better to use plastic ones, they will not attract cold, like metal ones, and they cost less. However, you do not need to buy very cheap ones - they will bend when used.
- So need drill a hole for the dowel. The depth of this hole should be two centimeters larger than the fungus. To calculate the required length of fungi, you need to add five centimeters to the wall to the thickness of the insulator and one centimeter per glue layer. Most often, 6 dowels - umbrellas should be used on one sheet of foam plastic, but if necessary, more can be used. There are several ways to arrange them (shown in the photo). But it is better to use the second option. Next, insert the dowels into the prepared holes and hammer them. The hat should be flush with the foam.
- Further, when all sheets are nailed, it is necessary check and process joints. Slots at joints larger than five millimeters need to be filled with construction foam. If the cracks are quite large (more than two centimeters), then additional pieces of foam must be inserted into them. Then you need to wait until the foam dries. It usually takes about five hours. Waste dried pieces of foam need to be cut off.
- After all the work done, you need to carry out wall finishing. First you need to carefully treat the walls with a primer, and then carefully wipe with an emery grater. The leveling layer should be approximately three millimeters.
All work, painted in stages, is carried out to the leveling layer. This layer is already the last stage, after which the walls are primed and rubbed. After this, the insulation is considered complete. Following the tips described above, you can do it yourself, without the involvement of specialists, to insulate a wooden house with penoplex outside. The main thing is to have the desire to do it yourself and add a touch of patience.